Sell your music to 250+ platforms partners of Sono Mus worldwide !
With Sono Mus digital music distribution, you can upload, distribute and collect royalties from your music on all music stores and platforms worldwide, or select the services where your music is not yet available. We take care of the rest!
WE ARE THE FIRST MUSIC DISTRIBUTORS WHO PROTECTS AND HELPS BEAT MAKERS / MUSIC PRODUCERS
SONO MUS PARTNERS
Distribute your release step by step
To distribute your album, you must select “Create a release” (regardless of the format) in Catalog > Albums. This is the process that must always be done, whether it’s an album, an EP, or a single.

Once created, you will have to follow the 6 tabs of the release and fill in the necessary metadata:

1. Release info:
In the tab “1. Release info” you must enter the following metadata:
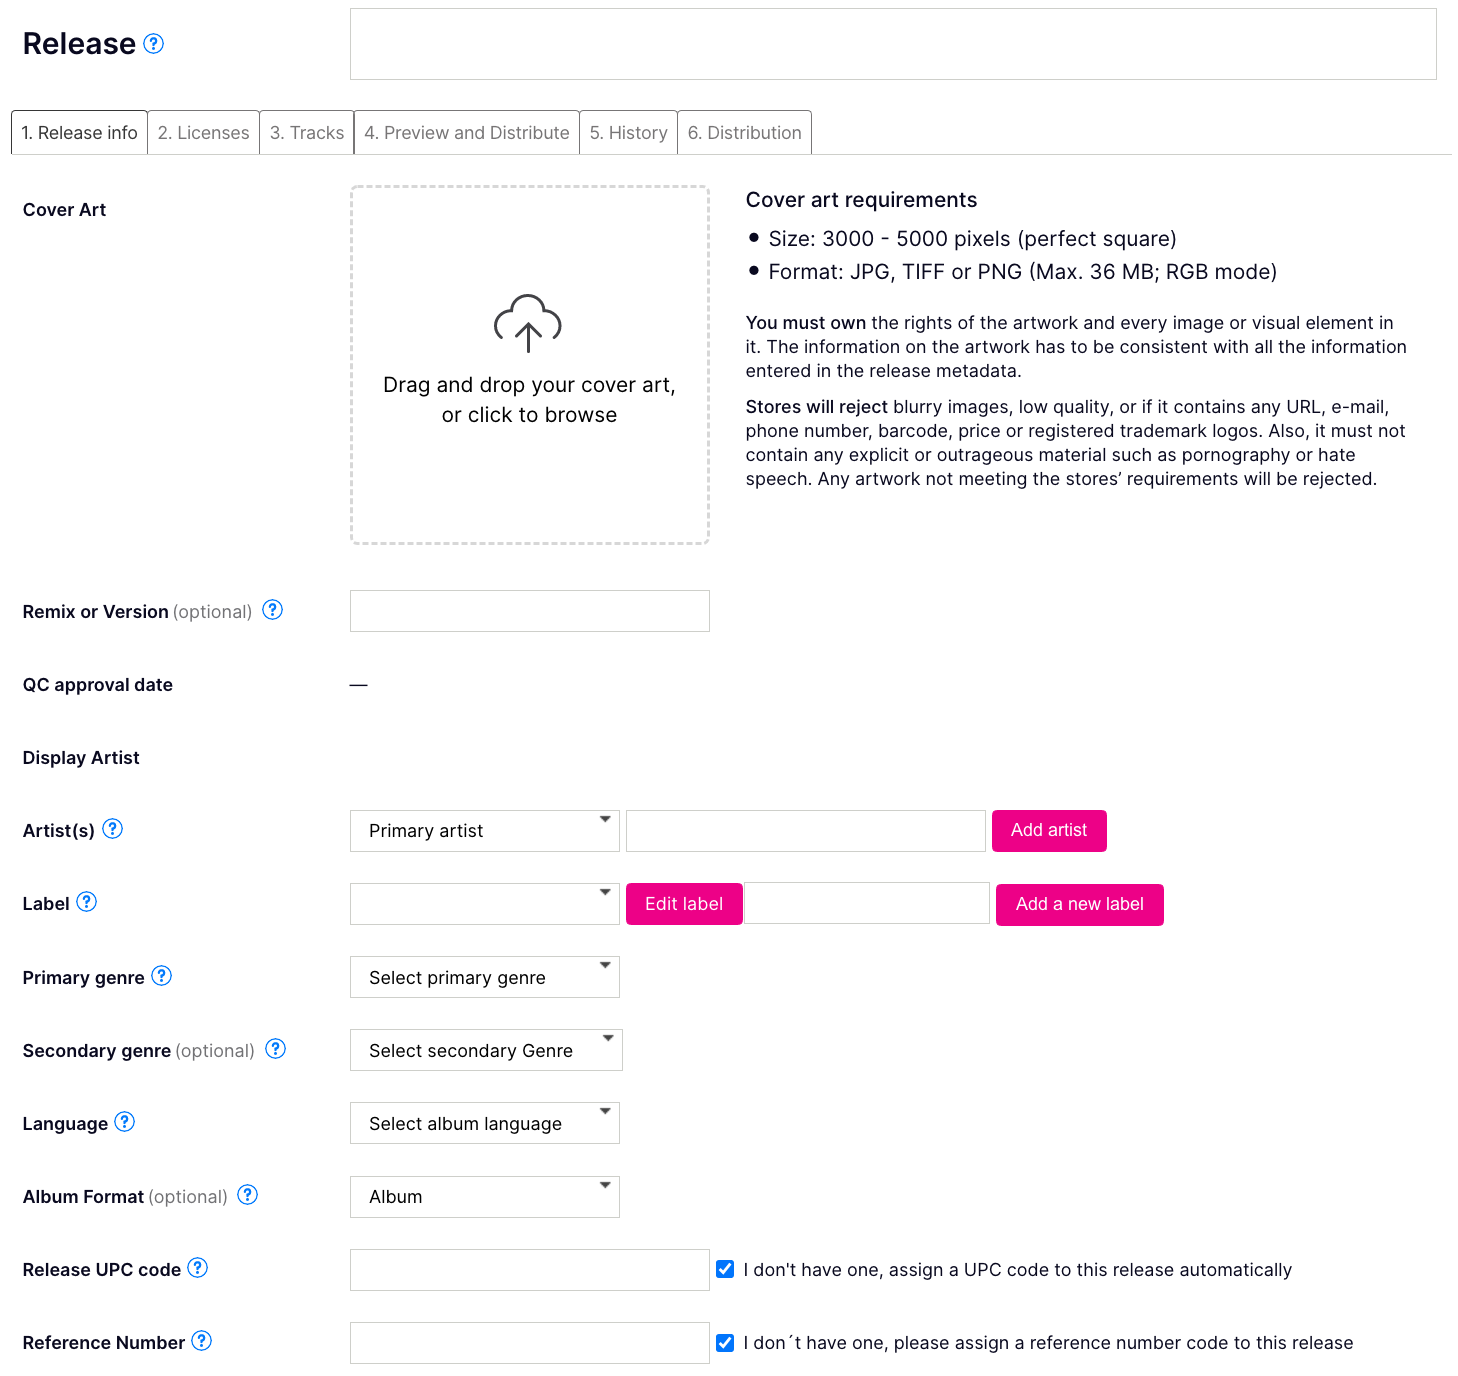
- Album (release title). If it is a single of one track, the title must be the same at track level.
- Cover Art. You must upload an image file from your computer.
- Remix or version. This field is not mandatory, it should only be filled in the case the release is a remix, a version, or a special edition.
- Artist(s). You can introduce different artists with different roles.
- Label. If you are not with any label you can enter the name of the main artist.
- Genres. You can introduce primary and secondary genres.
- Language. The main language of the release.
- Explicit Lyrics. It should only be marked if one or more tracks on the release contain explicit lyrics. This option should also be marked at track level.
- Format. It is necessary to specify whether it is a single, an EP, or an Album.
- UPC Code and Reference number. If you do not have the codes you just have to check the box “Assign one to this album”, and the platform will assign them automatically as soon as the distribution process begins after the QC approval.
2. Licenses:
In the 2. Licenses tab you will have to enter the following metadata:
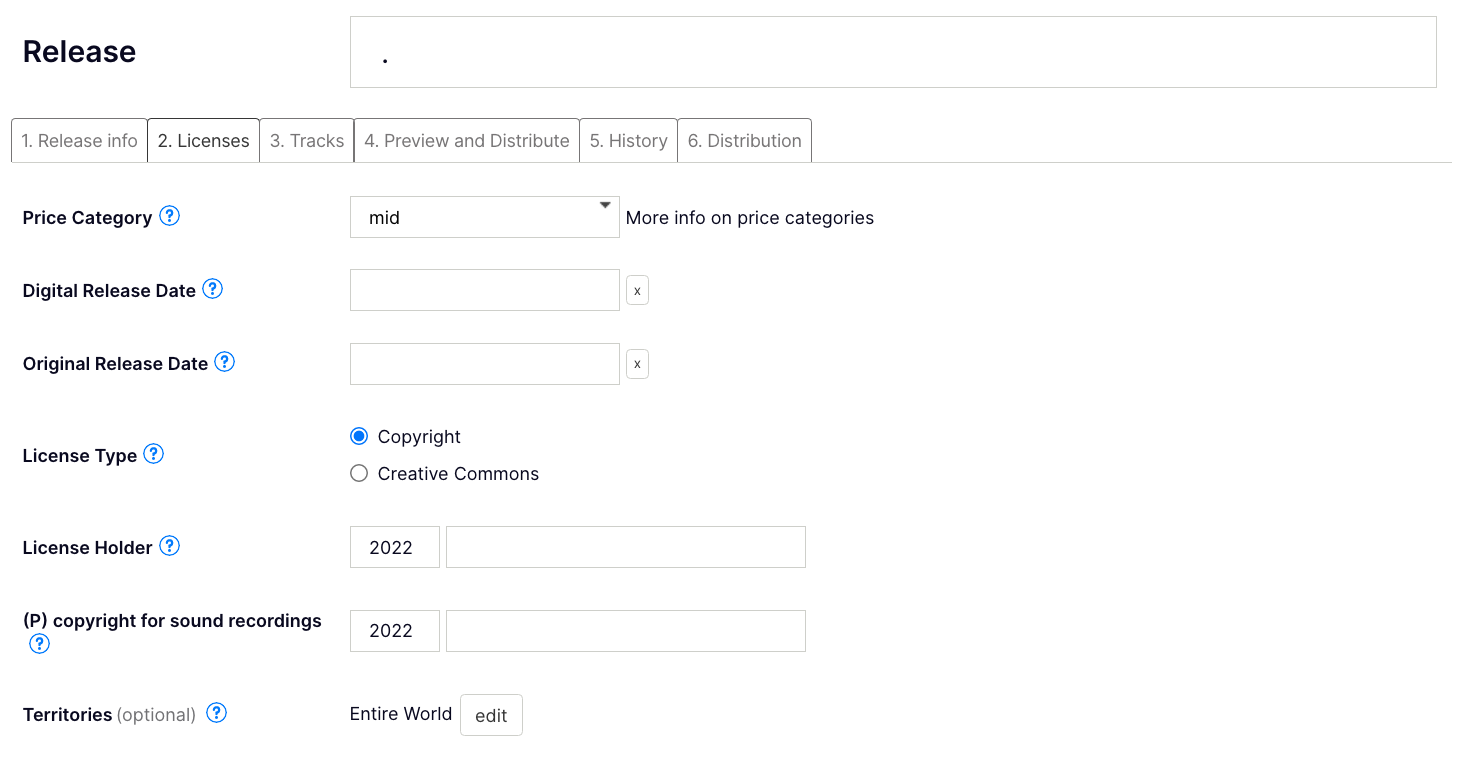
- Price category. Select a price range. This will mark the price of your release in stores.
- Digital Release Date. The date for it to be available on the channels. Keep in mind that channels can take 2 to 15 days to publish.
- Original Release Date. The date on which the album was originally released. If it has not been released before, the date will be the same as the Digital Release Date.
- License Type. Copyright or Creative Commons.
- License Holder. The legal name of the release owner.
- (P) copyright for sound recordings: Legal name of the sound recording rights owner.
3. Tracks
If it is the first time you distribute a release and you never uploaded these tracks to the platform before, you must select “From your Computer”, since the tracks won’t be available “From catalogue”.

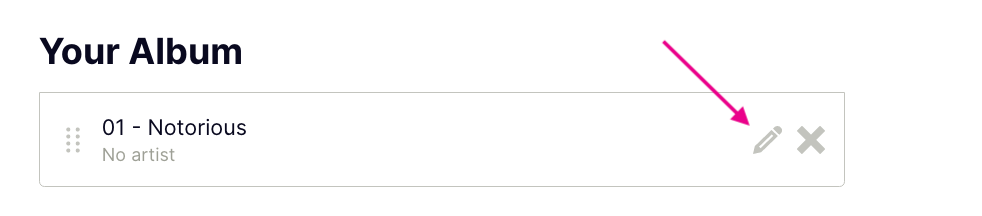
Once the tracks are uploaded correctly, review and edit the information of each track by clicking the edit icon on the right. More information can be found here.
4. Preview and distribution
Here you will see all the information about the album that has been added. In the upper right, the button “Distribute this release” will appear indicating that you can distribute.
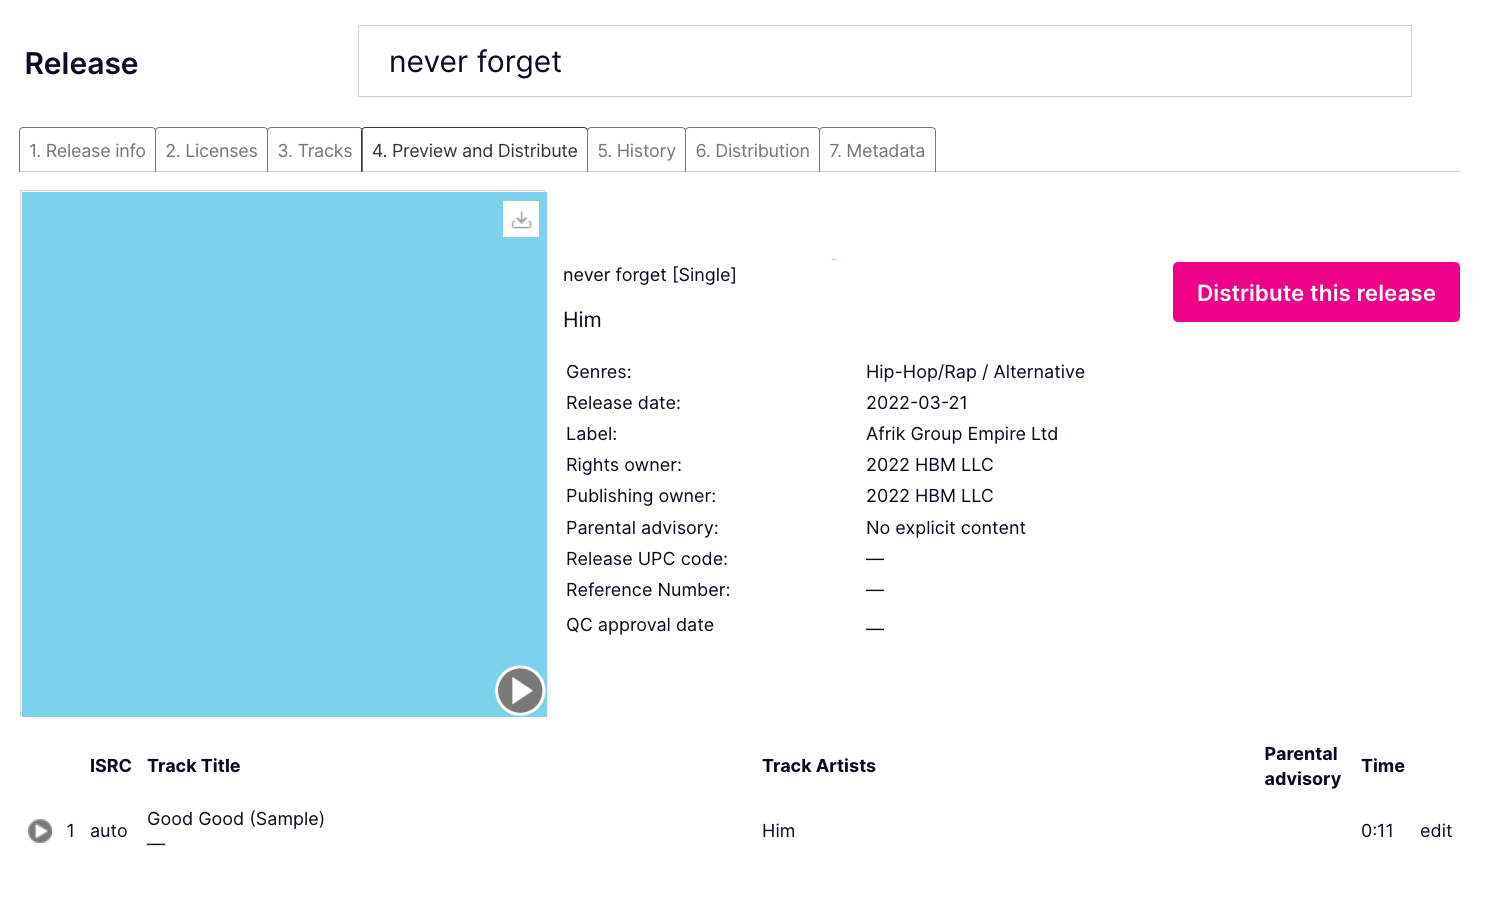
By clicking that button you will see all available distribution channels. Select the channels you want. Once the channels have been selected, the summary of your order will appear and you can proceed to checkout. You only have to add your billing information and confirm the payment.
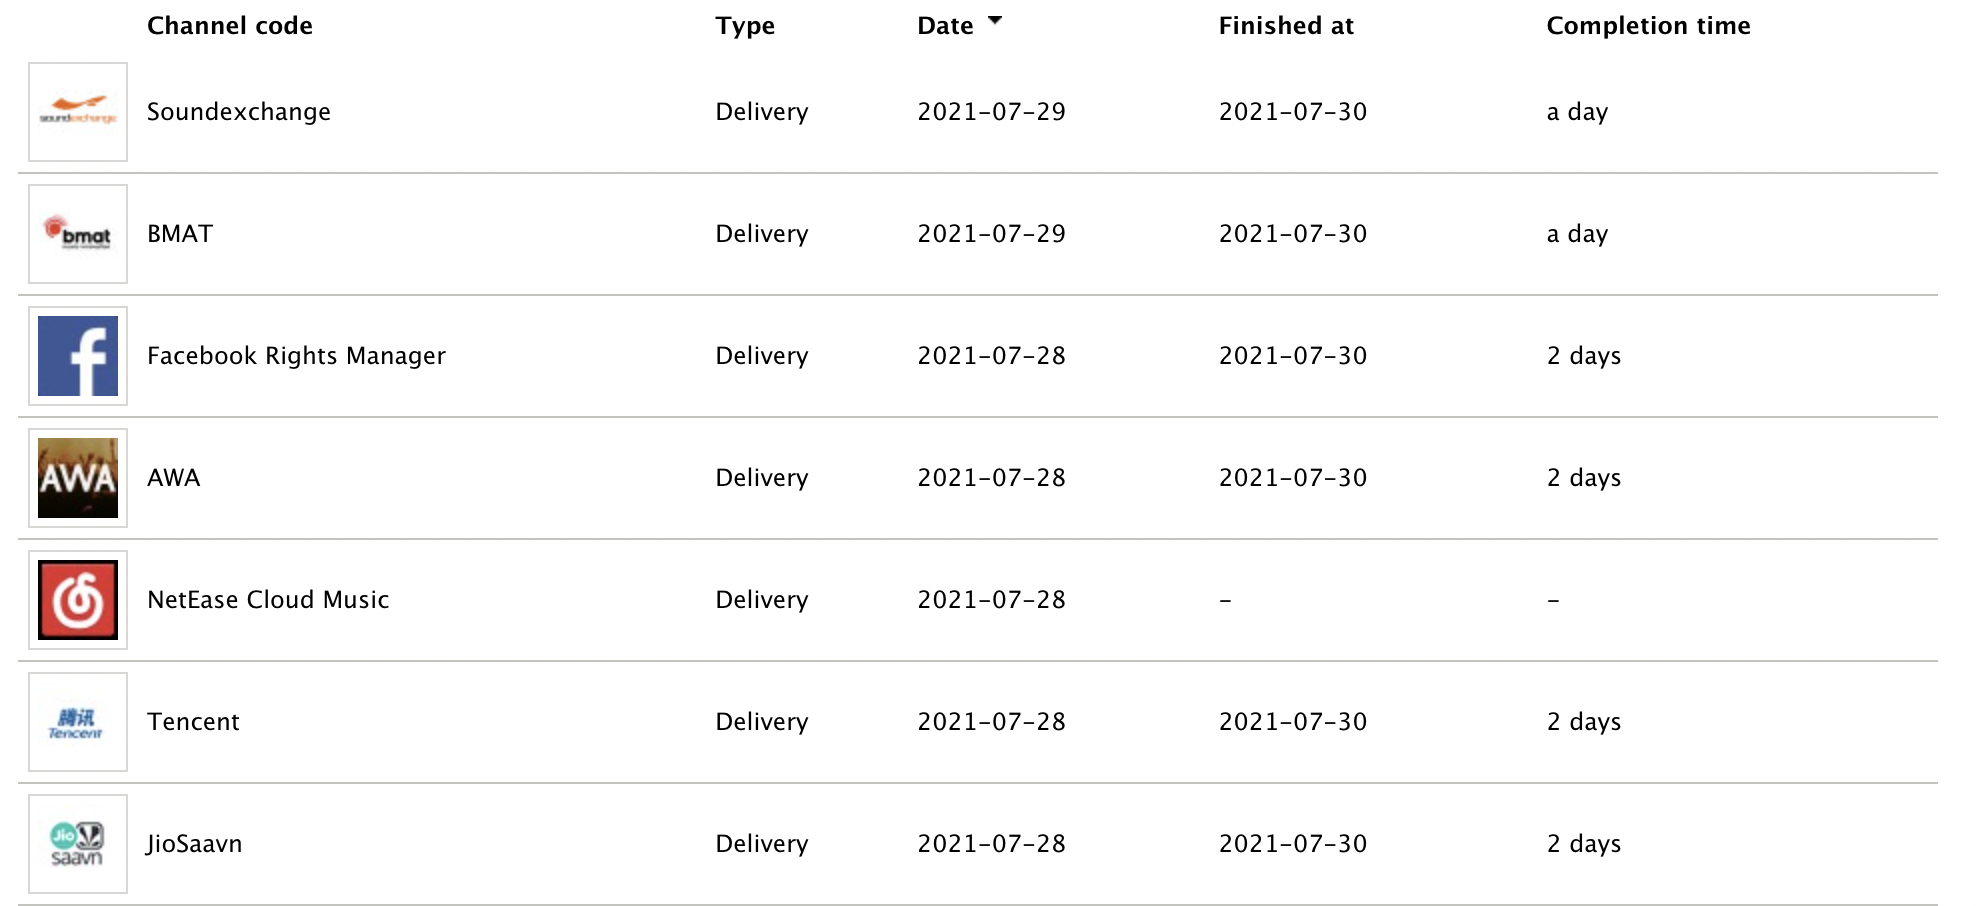
5. History
Once the album has been validated and sent to distribution, you will be able to verify the status of the pending deliveries as well as the QC approval in the tab “5. History“, a “Finished at” date and “Completion time” indicates that the delivery has been processed. Take into account that the content will be available within a period of 2 to 15 days depending on each DSP.
6. Distribution
From this tab, you’ll be able to Distribute/Update/Takedown your release. If you are interested in operating for all channels, you’ll find the options “to all channels” in the upper part of the tab. On the other hand, if you want to request it for a specific channel, you’ll find the option under the “Actions” column.


Adding tracks to a release
When creating a release, you’ll have two ways to add tracks from tab 3 “Tracks”:

- From Computer: If the track has never been uploaded to the platform, you should select this option and upload the file from your computer.
- From Catalog: If the track has been already uploaded to the platform, you should select this option and search it from your platform Catalog.
Filling tracks metadata
After adding your track, once you access it from the editing icon, you should fill in all necessary metadata:
- Title: Here you should introduce your track’s title. Remember that for one-track releases, the title must be the same at track and album level.
- Remix or version: This field is not mandatory, it should only be filled in the case that the single or the album is a remix, a version, or a special edition. For one-track releases, the version must be the same at track and album level.
- Version, karaoke, parody, tribute, or cover: You should mark this option as true if your track is a Version, karaoke, parody, tribute, or cover of an original song.
- Audio: Upload your audio file.

- Artist(s): Here you should introduce all the participants of this track. More info here.
- Primary Genre: This field is mandatory.
- Secondary Genre: This field is not mandatory.
- ISRC code: If you don’t have an ISRC code to identify the track, activate the “I don’t have one, please assign an ISRC to this track” option.
- (P) Publishing Rights: Legal name of the publishing rights owner.
- Lyrics: This field is not mandatory. The lyrics introduced here just will be sent to iTunes, other DSPs use external services.
- Language: The main language of the track.
- Available separately: If you distribute a release with two or more tracks and want them to be available separately in download channels.
- Notes: This field is not mandatory and is of internal use, so nothing in it will be sent to DSPs.